Being here in Hawaii has been nice, but we aren't used to being away from everyone for the holidays. So my friends and I decided to have a potluck on Christmas Eve. It was such a fun time, and we even got to hang out with some people we had never spent time with before. There was tons of good food, and so many leftovers!
I made chicken tamales, chicken pozole, pumpkin empanadas, mexican elote, and lemony crinkle cookies. There was also shrimp salad, macaroni salad, raspberry walnut salad, pot roast, ambrosia, cheesy mashed potatoes, and probably more I'm forgetting! It was so so good & such a great time.
Well, I posted a picture of some tamales I was eating, and was asked to post a recipe for them. I will totally say (for those of you from back home in Indiana) THESE TAMALES ARE NOT AS GOOD AS THE TAMALES FROM LAREDOS. Ha ha! My grandparents restaurant sells pork tamales they've totally perfected over the last 45 years, and I will admit that these are not perfect! But they stone ground their own corn for their masa, and I used store bought maseca, which is like instant masa. They were still pretty good, just not as tasty as the real deal masa! It totally gets the job done though!
Back home, a dozen tamales goes for $8-10, but here in Hawaii, good mexican food is hard to come by, so $20 is the average price for a dozen. Meat is pricey out here & these things are pretty labor intensive. A lot goes into making good tamales, so you have to be patient and be sure to set aside a few hours for mixing everything and spreading the masa onto the hojas (corn husks) and even more time to fill them, roll them, and steam them :)
I won't make you wait any longer, this recipe is going to be pretty detailed... so be prepared!
----Chicken Tamales----
What you'll need:
approx 2.5 lbs of chicken (I used boneless skinless breasts, but thighs would work also)
cumin
garlic
salt
pepper
tomatillos
cilantro
*reserved chicken broth once chicken is finished cooking
Maseca
lard or shortening (i used crisco)
Hojas (dried corn husks)
First, I was cooking the whole day, so to save myself some of the hassle, I put about 6 large frozen chicken breasts in the crock pot the night before. I added a cup of water, and sprinkled salt, pepper, cumin, and garlic powder in. I put it on low, and let it go all night.
The next morning, I stirred the chicken around, and tasted it to be sure it was seasoned to my liking. There is no right or wrong way to season the filling. They are YOUR tamales, so you decide how much cumin and garlic you like!
Then, to save myself even more time (because these things take quite a while) I dumped the chicken into the bowl of my kitchen aid mixer, saving the juices left in the crock pot in a bowl on the side. I put the paddle attachment on, and set the mixer to 2, and let it go for about 2 minutes. The chicken comes out very finely shredded, which is perfect for tamales!

I then took some pre-made salsa verde cooking sauce (which you don't have to use, but in this case, it worked for the little extra that I needed) and mixed it with 4 tomatillos i roasted off in the oven until they were tender. I threw them in the blender, with a handful of cilantro and blended them for a couple of minutes until everything was smooth. I poured some into the chicken, enough to moisten the chicken, but not so much that the chicken was dripping. If you put too much sauce into the chicken, it will make the tamales soggy. So be sure to put enough to hold the chicken together when you pinch it between your *clean* fingers, but not enough that it runs all over your hands.
Once the chicken is seasoned to your liking, set it aside.
Take out some hojas, and put them into a large bowl. Fill the bowl with hot water, and put a heavy plate on top of the hojas to hold them down. Let the hojas soften up in the water for about 30-45 minutes AT LEAST. You must soak them, because we need them to be soft and pliable enough to roll and fold them with no breakage.
For the maseca, follow the instructions on the bag. I usually just dump a bunch in a bowl with some of the chicken broth, some salt, and some water. The most important thing here, is that the masa is moistened enough to spread smoothly on the hojas, but not so wet that it's sliding and dripping everywhere. Every 20 mins or so I was having to add more liquid, just to keep the masa from drying out as I worked.
Right here, I used the back of my spoon to check the texture of my masa, this was perfect and smooth, but not too wet. What you're going to do, is hold the hoja is your left hand (if you're right handed) and with your right hand, drop a spoonful of masa on the wet & softened hoja, and spread it out in a thin even layer with the back of a spoon. Go about 2/3 of the way up the hoja, and stop, so you have leftover clean hoja and the top to fold down, for steaming.
Add a thin line of your meat down the center of the prepared hoja, only where part where the masa is.
Fold in one side, then fold the top down, and lastly, roll it closed. That's one tamal! Many, MANY more to go!
The pot I used, is specifically for tamales. It's deep, and has a lip about six inches up from the bottom, where a plate with holes sits, so the water in the bottom can come up, and steam the tamales, also, so the juices that drain out, don't just sit on the tamales, because then, they would be soggy.
If you don't have a tamale pot, it's FINE! Just add a small amount of water, and every 30 mins the pot is on the stove, add more water. That way, the tamales aren't sitting in a big pool of water, but still have enough to produce steam to cook them. Putting some extra hojas down at the bottom of the pot will also help to prevent burning on the bottom of your tamales. (don't add water until right before you cover the pot)
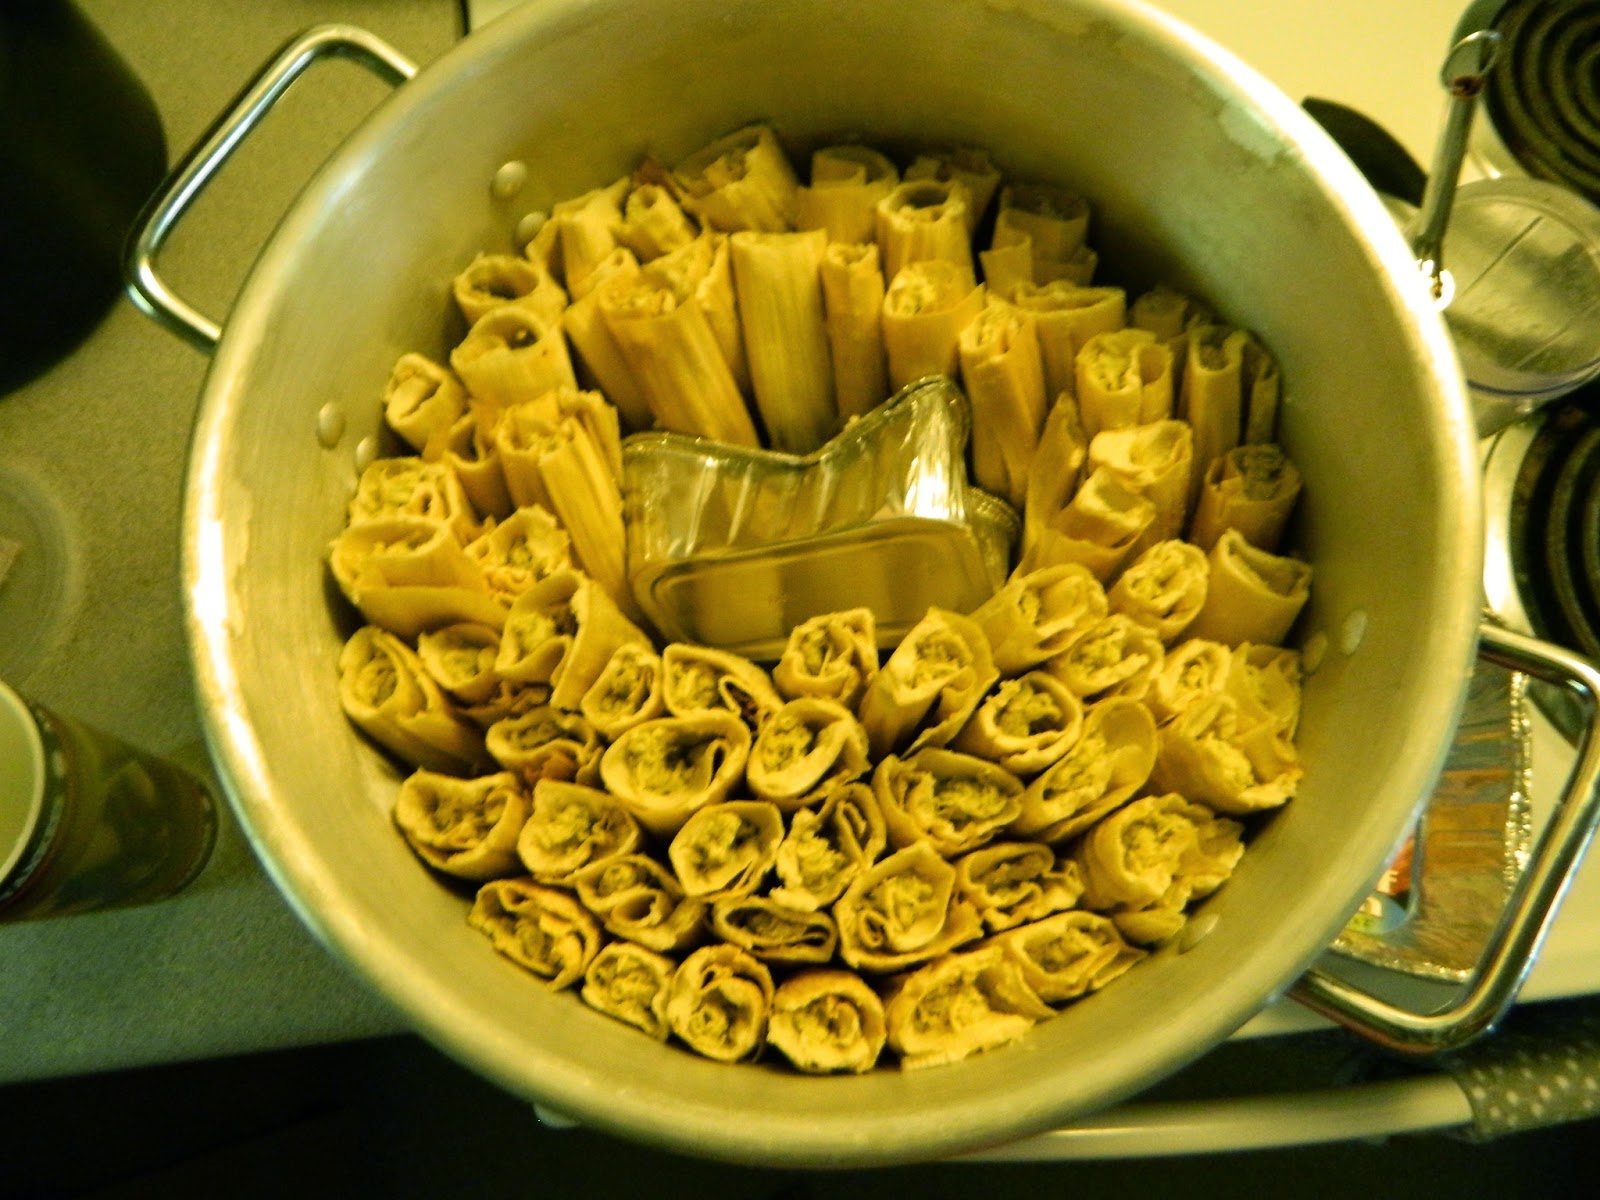
I lay my pot on it's side, and put all my tamales in, open side UP.
When I run out of filling, I always turn to my favorite, rajas y queso (Pickled Jalapeno slices with cheese) THEY ARE SO SO GOOD! And so I can tell them apart from the chicken tamales, I take small strands of hojas, and tie them around the tamales. Easy peasy!
I didn't end up making enough tamales to do a full later in the pot, so what I usually do, is take an empty foil loaf tin, and mold it into whatever shape i need to fill the space and keep the tamales all standing. You can also use a ceramic mug or just a ball of foil.
I poured in about 4 cups of water, and covered TIGHTLY with foil, then my lid. Holding that steam in is key, because that's what's cooking our tamales!
Put your burner on med/high (6 or7 on my stove) for about 30 minutes, then on medium (4 or 5) for the last hour and a half. *Remember, if you're using a regular pot, add a cup of water to begin, then every 30 mintues, add an additional 1/2 cup of water, to keep steam going.*
After your 2 hours is up, turn the burner off, remove from heat, and let the tamales sit, STILL COVERED, for about an hour before you check them out.
Make sure you remove your hojas before you eat them, it's sad I have to tell people that HAHA ;)
VOILA!
TAMALES WITH MY MEXICAN RICE ON THE SIDE MMMM! HOPE YALL ENJOY THIS RECIPE!