Sunday, February 22, 2015

Lemon Sugar Cookies

So, let's be serious. Everyone loves lemon flavored desserts, including myself. I've been trying all sorts of lemony things for the blog lately, and I can't say I'm mad about it. These cookies are damn good, and that's saying a lot, since I don't like sugar cookies. These pack much more flavor than any other sugar cookie I've ever had.

My husband took me to Best Buy on Valentine's Day to pick out a fancy new camera for the blog.... and well, life... can't forget life. :) We talked to one of the people who work for Sony, and she was showing us a really expensive camera we fell in love with. We were kind of heart broken, until she told us, the smaller model was just as good, and better for us, since we were using it for pictures of Bennett, and food for the blog.

HOW. FREAKIN. EXCITING.

So the camera we bought is a Sony a5000. I still can't decide how much I love it, the saleswoman was much better at taking pictures with it. I'm trying to figure it out, but I feel like I got some pretty decent pictures of the cookies, especially with the terrible lighting I was working with. On base housing has the worst lighting.... it's so yellow and dull!

I also recently bought a silicone baking mat, and baking sheets! I have been eyeing the SILPAT for some time now, but I found the Martha Stewart brand one for much cheaper at Bed Bath & Beyond, and I really love it after making these cookies! Such easy clean up, no left over gunk, no scrubbing. It's really great, and super cute! I purchased the baking sheets in a 2 pack at TJ Maxx for $16, incase anyone is interested.

ANYWAYS, I really hope everyone tries this recipe out, I really love it, and Bennett can't seem to get enough of these sugary lemony cookies! They stay so soft! We made them last night, and I just put them in an air tight tupperware container, and they are still perfectly soft this morning :) Can't beat that!


----Lemon Sugar Cookies----
makes 2 dozen cookies

2 sticks of butter, room temperature
1 egg
1 1/2 cups granulated sugar
2 1/4 cups all-purpose flour
1/2 tsp baking powder
pinch of salt
1 tsp vanilla
juice of 1 large lemon
zest of 3 lemons (reserve zest of 1 lemon for rolling)
1/2 cup granulated sugar (to be mixed with previously mentioned zest, for rolling)

Preheat oven to 350F. Line cookie sheet with parchment paper, or a non stick baking mat.

Cream together the butter and granulated sugar until light and fluffy. About 2 minutes on medium speed. Then add the egg and vanilla, and combine.


In a seperate bowl, sift together salt, baking powder, and flour. Also, zest 2 lemons into the butter mixture, and the juice of 1 lemon. Add the dry ingrentients, and mix on low speed until the flour is well incorporated, then on medium to be sure everything is well combined. If you're using a stand mixer, be sure to scrape the sides down, and get all the butter and flour well combined.
Refridgerate cookie dough for 10 minutes before scooping and rolling (and in between batches), it makes it much easier to work with, and the chilled dough won't spread and flatten as much as room temperature dough.


In a small dish, combine 1/2 cup sugar with zest of 1 lemon. Take small scoops of cookie dough, and roll in the lemon sugar. Place on baking sheet about 2 inches apart, gently press down the dough balls to flatten a bit, and repeat with all the cookies.


Bake for 10-12 minutes. Allow them to cool about 5 minutes on the baking sheet, before transferring to a cooling rack. Store in air tight container.


ENJOY :)

* I only have 2 lemons in the picture, but I did use 3.
* Also, I made my lemon sugar in two smaller batches, 1/4 cup at a time, because I didn't want to waste any. But I used all of the sugar for rolling, so no need to make smaller batches.

Wednesday, February 18, 2015

Chicken Tamales

Being here in Hawaii has been nice, but we aren't used to being away from everyone for the holidays. So my friends and I decided to have a potluck on Christmas Eve. It was such a fun time, and we even got to hang out with some people we had never spent time with before. There was tons of good food, and so many leftovers!

I made chicken tamales, chicken pozole, pumpkin empanadas, mexican elote, and lemony crinkle cookies. There was also shrimp salad, macaroni salad, raspberry walnut salad, pot roast, ambrosia, cheesy mashed potatoes, and probably more I'm forgetting! It was so so good & such a great time.

Well, I posted a picture of some tamales I was eating, and was asked to post a recipe for them. I will totally say (for those of you from back home in Indiana) THESE TAMALES ARE NOT AS GOOD AS THE TAMALES FROM LAREDOS. Ha ha! My grandparents restaurant sells pork tamales they've totally perfected over the last 45 years, and I will admit that these are not perfect! But they stone ground their own corn for their masa, and I used store bought maseca, which is like instant masa. They were still pretty good, just not as tasty as the real deal masa! It totally gets the job done though!

Back home, a dozen tamales goes for $8-10, but here in Hawaii, good mexican food is hard to come by, so $20 is the average price for a dozen. Meat is pricey out here & these things are pretty labor intensive. A lot goes into making good tamales, so you have to be patient and be sure to set aside a few hours for mixing everything and spreading the masa onto the hojas (corn husks) and even more time to fill them, roll them, and steam them :)

I won't make you wait any longer, this recipe is going to be pretty detailed... so be prepared!

----Chicken Tamales----

What you'll need:
approx 2.5 lbs of chicken (I used boneless skinless breasts, but thighs would work also)
cumin
garlic
salt
pepper
tomatillos
cilantro
*reserved chicken broth once chicken is finished cooking
Maseca
lard or shortening (i used crisco)
Hojas (dried corn husks)


First, I was cooking the whole day, so to save myself some of the hassle, I put about 6 large frozen chicken breasts in the crock pot the night before. I added a cup of water, and sprinkled salt, pepper, cumin, and garlic powder in. I put it on low, and let it go all night.


The next morning, I stirred the chicken around, and tasted it to be sure it was seasoned to my liking. There is no right or wrong way to season the filling. They are YOUR tamales, so you decide how much cumin and garlic you like! 
Then, to save myself even more time (because these things take quite a while) I dumped the chicken into the bowl of my kitchen aid mixer, saving the juices left in the crock pot in a bowl on the side. I put the paddle attachment on, and set the mixer to 2, and let it go for about 2 minutes. The chicken comes out very finely shredded, which is perfect for tamales! 
I then took some pre-made salsa verde cooking sauce (which you don't have to use, but in this case, it worked for the little extra that I needed) and mixed it with 4 tomatillos i roasted off in the oven until they were tender. I threw them in the blender, with a handful of cilantro and blended them for a couple of minutes until everything was smooth. I poured some into the chicken, enough to moisten the chicken, but not so much that the chicken was dripping. If you put too much sauce into the chicken, it will make the tamales soggy. So be sure to put enough to hold the chicken together when you pinch it between your *clean* fingers, but not enough that it runs all over your hands.


Once the chicken is seasoned to your liking, set it aside.


Take out some hojas, and put them into a large bowl. Fill the bowl with hot water, and put a heavy plate on top of the hojas to hold them down. Let the hojas soften up in the water for about 30-45 minutes AT LEAST. You must soak them, because we need them to be soft and pliable enough to roll and fold them with no breakage.


For the maseca, follow the instructions on the bag. I usually just dump a bunch in a bowl with some of the chicken broth, some salt, and some water. The most important thing here, is that the masa is moistened enough to spread smoothly on the hojas, but not so wet that it's sliding and dripping everywhere. Every 20 mins or so I was having to add more liquid, just to keep the masa from drying out as I worked.

Right here, I used the back of my spoon to check the texture of my masa, this was perfect and smooth, but not too wet. What you're going to do, is hold the hoja is your left hand (if you're right handed) and with your right hand, drop a spoonful of masa on the wet & softened hoja, and spread it out in a thin even layer with the back of a spoon. Go about 2/3 of the way up the hoja, and stop, so you have leftover clean hoja and the top to fold down, for steaming.


Add a thin line of your meat down the center of the prepared hoja, only where part where the masa is.


Fold in one side, then fold the top down, and lastly, roll it closed. That's one tamal! Many, MANY more to go!


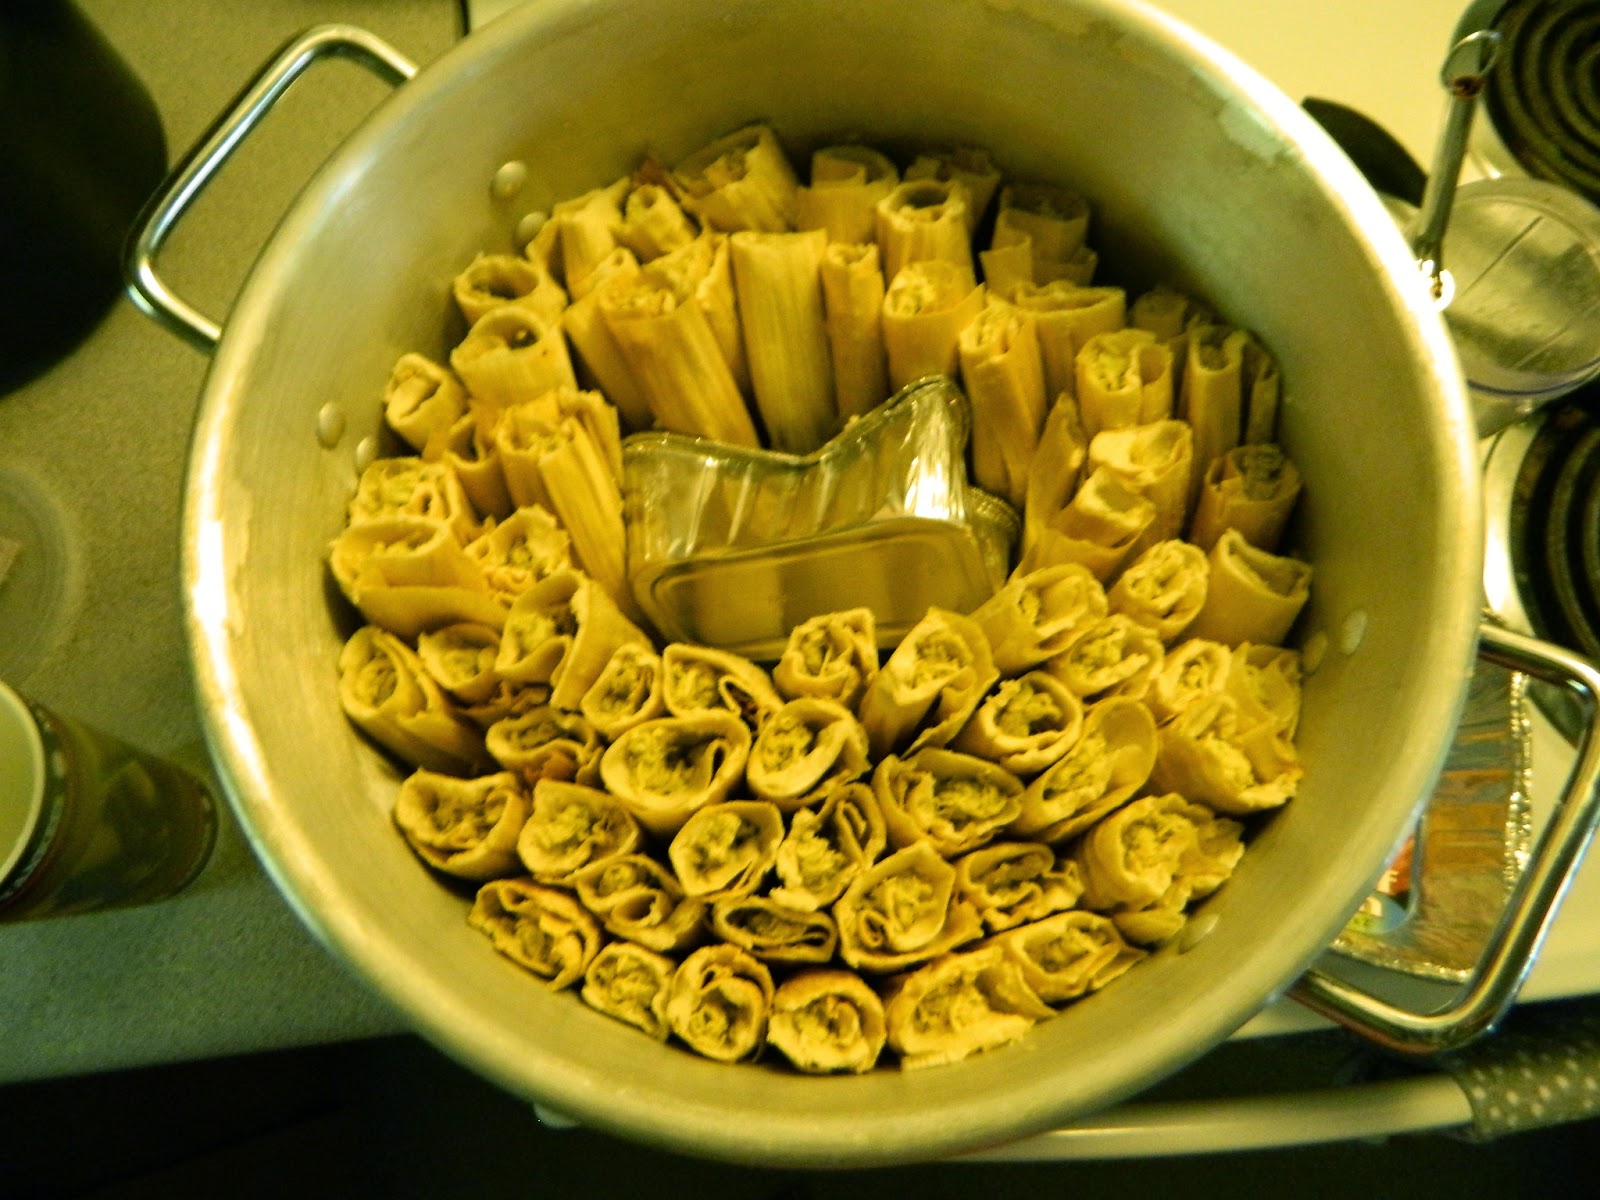
The pot I used, is specifically for tamales. It's deep, and has a lip about six inches up from the bottom, where a plate with holes sits, so the water in the bottom can come up, and steam the tamales, also, so the juices that drain out, don't just sit on the tamales, because then, they would be soggy.

If you don't have a tamale pot, it's FINE! Just add a small amount of water, and every 30 mins the pot is on the stove, add more water. That way, the tamales aren't sitting in a big pool of water, but still have enough to produce steam to cook them. Putting some extra hojas down at the bottom of the pot will also help to prevent burning on the bottom of your tamales. (don't add water until right before you cover the pot)

I lay my pot on it's side, and put all my tamales in, open side UP.
When I run out of filling, I always turn to my favorite, rajas y queso (Pickled Jalapeno slices with cheese) THEY ARE SO SO GOOD!  And so I can tell them apart from the chicken tamales, I take small strands of hojas, and tie them around the tamales. Easy peasy!


I didn't end up making enough tamales to do a full later in the pot, so what I usually do, is take an empty foil loaf tin, and mold it into whatever shape i need to fill the space and keep the tamales all standing. You can also use a ceramic mug or just a ball of foil.


I poured in about 4 cups of water, and covered TIGHTLY with foil, then my lid. Holding that steam in is key, because that's what's cooking our tamales!


Put your burner on med/high (6 or7 on my stove) for about 30 minutes, then on medium (4 or 5) for the last hour and a half. *Remember, if you're using a regular pot, add a cup of water to begin, then every 30 mintues, add an additional 1/2 cup of water, to keep steam going.*

After your 2 hours is up, turn the burner off, remove from heat, and let the tamales sit, STILL COVERED, for about an hour before you check them out.

Make sure you remove your hojas before you eat them, it's sad I have to tell people that HAHA ;)

VOILA!


TAMALES WITH MY MEXICAN RICE ON THE SIDE MMMM! HOPE YALL ENJOY THIS RECIPE! 


Friday, February 13, 2015

Valentine's Day treats: Chocolate Marshmallow Heart Cakes

The title is crazy, right? I KNOW. I was racking my brain trying to think of something heart shaped to make, and I just couldn't think of anything. Then I remembered how much I LOVE chocolate ganache.

The first time I made chocolate ganache was for my mother in law's birthday a few years ago, in the pre-Bennett years. I made a really moist chocolate bundt cake, covered in a chocolate ganache and it was a HIT. It really really was so good.... I'm not tooting my own horn, I'm serious! It was amazing, I put that recipe in my recipe book, I loved it.

And because of how much I loved that cake, I tried to think how I was going to combine hearts and ganache, and this is what I came up with. These little cakes did end up falling apart on me a bit, because the cake recipe I followed, which was from Pioneer Woman, called for a large jelly roll pan, and I only had two medium sized pans, so I had to split my cake batter in two parts. The larger of the two cakes was thicker and it cracked a bit more than the thinner, slightly smaller cake. It really helps holding the cookie cutter in place, and packing the little crumbs in there, to help hold the shape.

I made it work, though. The chocolate sheet cake recipe from Ree Drummond is so moist and tasty! It made it a bit easier to pack the small torn pieces back together when the hearts were falling apart.

I will say, this was my first attempt at anything like this, so a few of my hearts were messy, but my husband LOVED them... that's all that matters, right? :)

Well, here it is, my delicious heart shaped, marshmallow fluff filled, chocolate ganache covered cakes. I hope yall enjoy!

----Chocolate Marshmallow Heart Cakes----
(cake recipe from Pioneer Woman)


Chocolate cake:

2 cups Flour
2 cups Sugar
1/4 teaspoon Salt
4 Tablespoons (heaping) Cocoa powder
2 sticks Butter
1 cup Water (boiling)
1/2 cup Buttermilk (see below for a substitute)
2 whole Beaten Eggs
1 teaspoon Baking Soda
1 teaspoon Vanilla

Filling:
Marshmallow Fluff

Chocolate Ganache:
1 cup chocolate chips
1tbsp butter
1/4 cup heavy whipping cream


Sift together flour, sugar, and salt in a large bowl. Set aside.


In a small saucepan, bring water to boil. In another small saucepan, melt butter, and add cocoa, and stir until the cocoa is dissolved. Then, add the boiling water and let the mixture boil for 30 seconds, then, add it to your dry ingredients. Be careful not to burn yourself. Stir the mixture until well combined.

In a small bowl, mix buttermilk, baking soda, vanilla and beaten eggs. 


**IF YOU DO NOT HAVE BUTTERMILK** put about a tablespoon of lemon juice into whatever size measuring cup you need for buttermilk, and fill it the rest of the way with regular milk. Stir it around, and let it sit for 5 minutes before adding it to your ingredients.

Add milk mixture to your cake mixture. Stir to combine.

*Pioneer Woman's recipe called for an 8x 13 jelly roll pan, I just used two medium pans instead.

Grease your pan, and pour in your cake batter. Bake at 350 for 20 minutes. (Unless, you are using two pans, like myself.... my smaller pan took 12 minutes, and my larger one took 17)

Allow your  cakes to cool before overturning them onto parchment paper.

Meanwhile, melt your chocolate in the microwave, at 30 second intervals. Then, add the very warm cream, and the butter, and stir. If you are not going to be working quickly, which I wasn't, You can start a double boiler, and put your chocolate in there, to keep it smooth enough to continue working with.


Cut your heart shapes out using a cookie cutter, and lay them on a cooling rack, with an empty pan underneath, to catch the chocolate drippings. Lay each heart out flat, and add a thin layer of marshmallow fluff, trying not to go too close to the edges, to prevent overflow.

 Put the second heart on top of the marshmallow layer, and coat with chocolate ganache. Once you have your hearts covered how you'd like them, allow them to set a bit, before serving.


* This ganache recipe does not bring the chocolate to a hardened state, so this is more of a fork and plate kinda cake. If you'd like the chocolate to set up, leave the cream out.*

And voila! These babies are soooo good! I hope yall enjoy these as much as we have :)